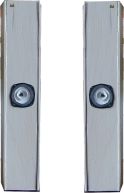
The PlayEX Double Horn
Speed, Power and Precession
History
The double horn has been
under development for some time. It all began several years ago.
Project Description
The goal is to create two, 2000mm*400mm*600mm (H*W*D) Double Horn Speakers, that will play frequencies from 59Hz to 20.000Hz. They will be front-loaded, back exhaust corner positioned. This will give a wider sound frequency, without violating the basic principles of horned speakers.To fill the void in the lower frequency, we will create one or two PlayEX Subs (Refer to the PlayEX Sub page).
Internal elements
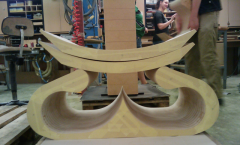
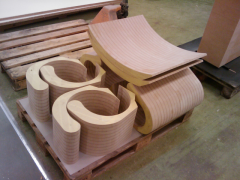
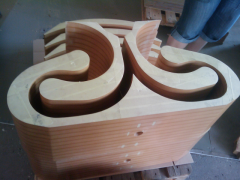
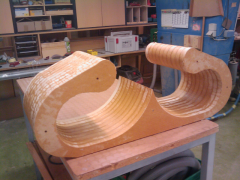
The internal elements will be cut from 28mm MDF plates. The idea is then to glue 10 identical parts to 280mm Elements. There are 3 different types of elements used in the process. All pieces have to have 8mm holes strategically placed, so that dowels can be applied to steer the parts together, when glued. These elements are given names to make the process description easier. The names came naturally in development.
- The Crab, because it resembles a Crab ( also because it is "crabby" to handle due to the massive weight)
- The Cradle, because it needed a name ( It actually rocks from side to side when you try to polish it )
- The Banana, because it doesn’t look anything like a Pantomime Horse (At all!!)
We have 2 speakers so the total number of elements will be..
- 2 Crabs ( 2 Speakers * 1 Crabs )
- 4 Cradles ( 2 Speakers * 2 Cradles )
- 4 Banannas ( 2 Speakers * 2 Bananas )
- 21 Crab elements ( 2 Crabs * 10 + 1 Crab)
- 41 Cradles ( 4 Cradles * 10 + 1 Cradle )
- 41 Banannas ( 4 Bananas * 10 + 1 Banana)
Cover Plates
25mm MDF plates.To seal in the internal elements, we have chosen 25mm MDF plates. This gives a solid frame for the construction. We need
- 2 Front panels ( 2 Speakers * 1 Front panel )
- 4 Side panels (2 * Speakers * 2 Side panels )
- 4 Top/Bottom panels ( 2*Speakers * ( 1 Top panel + 1 Bottom panel) )
Decoration Plates
Bright laminate maple plates for the exterior. We like bright colors, these plates where on sale. So the choice was kind of given :) We need the same sides as with the Cover Plates- 2 Frontpanels ( 2 Speakers * 1 Frontpanel )
- 4 Sidepanels (2 * Speakers * 2 Sidepanels )
- 4 Top/Bottom -panels ( 2*Speakers * ( 1 Toppanel + 1 Bottompanel) )
Driver
They will be equipped with 2 Lowther DX4 Hi-Ferric drivers (one each). These driver are extremely efficient, they will play 100dB at 1 meters distance with only 1 Watt! That's about the same level as a Cut off Saw or a Pneumatic peen hammer.Plugs
Speakon NLT-4MP. They look nice, are pretty, and did I mention that they look nice?
Internal driver connection wire
I will never admit that I actually bought 2 meters of Van Den Hul Snowline cable.
Goals
- Make the individual pieces as precise as possible.
- Make the individual pieces as even and sleek as possible, to enable a smooth expansion of the horn.
- Reduce dirt and sawdust to a minimum, to avoid ruining the driver.
- Make the speaker as robust and firm as possible, to reduce vibrations in the chassis.
Project History
20-06-2006
My wife and parents gave my scaled models of the PlayEX Horns, this was the symbolic acceptance of this unusual (H)WAQ project, and marked the start of a long, hard but rewarding project.
Pre August 2008
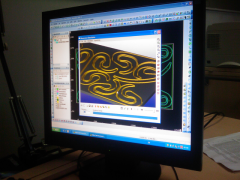
The planning face and drawing process began. The speaker chassis horn is designed by software written by my father. These plans were exported to the generic AutoCAD DWG format, because this format can be read by almost all drawing software.
The goal was to be able to create the internal chassis speaker horn by CAD/CAM CNC. The predecessor (the Nautrup Double Horn) was originally made in hand using a jigsaw. This resulted in a lot of post process polishing, because of the difference in size of the individual pieces.
The preference for using the CNC to cut out the individual pieces is two virtual plates, with all the pieces places on them. The result of this face is 2 different types of plates. 1 of the first type and 4 of the latter. The first plate contains 36 bananas. The second contains all the 3 types of internal elements, 6 Crabs, 12 Cradles and 2 Bananas.
......
15th and 16th of August 2008
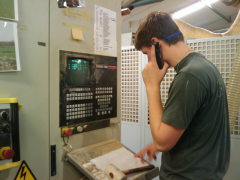
The day was here, we had scheduled an appointment with the workshop, where they had the CNC equipment, and where set to go. It looked like a pretty open and shut case, get the CNC to cut out the pieces while we were drinking Coke, glue the pieces together, put them in the press and we're all done.
It turned out that my naive mind did not fully understand the issues at hand :)
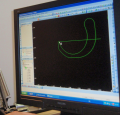
Issue #1. The drawings were not compatible with the CNC machine. The AutoCAD DWG drawings we had generated contained far too much information for the CNC machine to compute the data. A normal CNC program was about 50kb; our drawing was over 2.000kb, oops :( And back to the drawing board we went.
The original drawing contained the 3 internal elements. The biggest of these (The Crab) consisted of over 2.500 individual lines. The reason for this was that the exported drawing was created with a 1mm acuity. This means that a line was created for each 1mm, to create detailed curves.
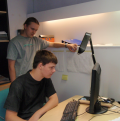
To fix this we began to draw curves in the CNC enabled software. This took several hours and a look of sweat. Each endpoint had to be aligned perfectly with the circular arc, both start and end. To achieve this a start, end and midpoint had to be found. Not an easy task, but after about 8 hours of hard work we finally made it.
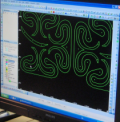
The result was a 49 line Crab, 20 line Cradle and 15 line Banana installed, with tool rail descriptions, on 2 virtual 28mm MDF plates :) Brilliant!
Or so we thought...
22th, 23th and 24thof August 2008
A week had passed, and our certainty of our new drawings are rock solid, the more we look at them, the more certain we got that they were supreme and flawless.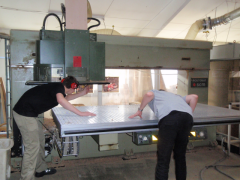
Friday the 22. August we had booked the workshop once again, and after work we were ready to go. Just before we went, we got the most terribly phone call. The CNC machine declined the drawings :(
1 of our 2 virtual plates had "broken lines". The other one worked however.
We began checking the drawings but could not find anything wrong, at first. We then tried to zoom in as much we could to find that the point where a circular arc meet a line. Bingo a broken line. We tried another point, again broken line. Every time we had a circular arc, we had a broken line. This could only be seen when we zoom in as much as the program would let us. This meant that the void between the line and the arc was only about 0,0001mm wide. This was, however, more than enough to bum out the CNC. The reason for these gaps (gaps in the crabs haha), is that a circular arc does not meet the exact endpoints of to random lines. This is understandable.
The game was set, we could not use this drawing, and they had to be altered. An error we didn't know of had set the project on hold. The odds were against us.
We decided to try anyway.
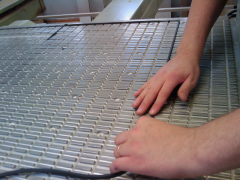 Later that day we began to cut out the bananas from the first virtual plate. This should be as easy as pie. We needed a sub layer for the miller to cut in, so that it would not hit the metal table beneath it all when we cut out the individual bananas.
We cut out a sub layer that resembled the dimensions of the 28mm MDF we used for the parts. Afterwards we placed it on the CNC's metal table and turn on the vacuum. The theory is that MDF is not air tight. Thereby the 28mm MDF will "stick" to the sub layer plate, which is vacuumed to the metal table. To achieve this, a rubber band needs to be placed in grooves in the metal table.
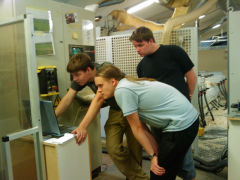 The CNC's security system needs a vacuum of 0,4 bar. We barely got 0,2, it refused to go any higher. After multiple attempts, we discovered saw dust on the metal table, under the sub layer. Where did that come from? We removed it, tried to vacuum again, without success. And again there was sawdust on the metal table. By coincidence I found a hole in metal table and in that gap was sawdust. Et voilà! We moved the rubber band, assured that now it would surely work, but again it did not. After try multiple combinations and 3 hours of trying, we try to lacquer the sub layer plate to get a smoother surface. Bingo 0,4 and we were ready to go. (NOT!)
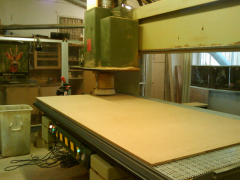
When we initiated the CNC sequence, the miller cut holes in thin air. The program was falsely set to the wrong depth, so it could not cut in the plate. We called the CNC dude, and he was so kind that he rushed to our rescue. The program setup was soon corrected, and the process began. Hurray !
After 2 cut out bananas the 3. was thrown from the CNC to the ground. The vacuum was not strong enough to hold the bananas fixated. We were now truly at one's wit's end.
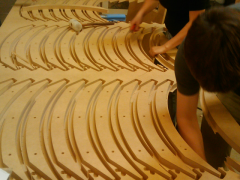 The first 3 bananas turned out to be useless. The fact that they were not held steady had utterly ruined the elements. But the CNC dude did not give up without a fight. The program was altered once again, now it did not cut all the way through the 28mm MDF, leaving about 1mm of spear MDF to hold the model together. This way the bananas would stay in place and everybody would cheer and be happy.
To release the bananas from the MDF we used cutting knife and brute forces. This method took a while but got the job done. The only issue was that the result was not smooth; there were fragments of extra MDF. A quick decision was made by the leaders in this time of crisis and despair. "Ignore it, deal with it later."
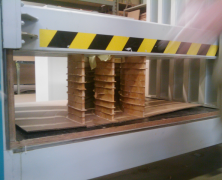 The bananas were clued together using dowels a hammer and put in the press. Here they will reside in minimum 24 hours until it is solid. The glue used is so called "Cold Glue", that is why it takes so long to harden.
The time was late, and it was many. Anyway, we headed in hast to the nearest pizza pusher to stock up.
After enjoying the local cuisine, we fired up the PC to work on those AutoCAD drawings once more...
We tried to align the lines and arc all evening. We tried everything, and read dozens of forum posts, blogs and manuals without any luck. At 00:30 we sieged, and went to bed. The hope was that a good night’s sleep was what we needed.
7:00 AM our day began; we rushed down to the workshop's CNC computer to test out new ideas, formed in our heads in the night. We had a deadline 10:00 AM, where the CNC guy promised he would to help us setup the CNC machine. If we didn’t make it, it would be a disaster.
None of our ideas worked properly, the only valid solution we had come up with, was to create a SPLINE reduction of the entire set. This would be a crappy ( with b's :D ) solution, because it would disfigure the elements horribly.
Suddenly my father called over the phone, he had an idea. The original AutoCAD drawing was made with a detail level of 1mm. If we changed the resolution to 10mm, the direct reduction of lines would be the factor of 10. Ergo 250 lines. This could work!
After a few minutes, the new drawing was transferred and imported into Alpha CAM (The CNC software). We quickly reduced a few obvious line combinations, and placed the elements like the week before. This time we worked "double-time”! It was going fast as lightning, but the time as against us. I saw a problem on the drawing, but ignored it because of the timepresure. We would not have time to correct it. So we had to find a solution for that later.
The CNC process program was saved and the CNC dude arrived. Pressure levels were good the first time, and the procedure was initiated instantly. The drawing was slowly but surely transferred and displayed onto Good Old Faithfull (The CNC machine). These minutes feels like days. The tension was extremely high. It felled like the final exam. The command to start was send, the noise began. Its working, it's working!
While the first MDF Plate was being milled, some quick calculations were made. If we subtracted the 3 banana's that was destroyed on the first plate( 36 + 4 * 2 - 3 ). We ended up with 41 bananas, exactly what we needed. So no banana could be spared at this point! Precession was the key.
It was an impressive sight to see, first all the holes were drilled in the plate. It was pretty impressive to see it drill without any borders, just on an empty MDF plate. Afterwards the plate was cut with the miller. The first plate was done, and the next step of the project could begin.
This time the extra MDF was too thick to cut through. No good can come, without the use of a jigsaw :) While some of us began to cut out the pieces from the Plate. The rest of us shifted plates, and after about an hour all 4 plates where done. That felt good, real good. Now we had the feeling that the worst part was over, the rest was just hard work.
The jigsaw could not clean cut out the plates, there were an extra 2-5 mm all the way round the pieces. Because we didn't want to risk anything, we had programmed the CNC to give us a good 2 mm in the depth, so we could not rely on post process polishing to save this. What to do? First we tried to polish it anyway, using the roughest abrasive paper in town. No luck. The material was way too tough for that. Then we tried to cut the waste material off with a wood chisel. After a few pieces, and a sour shoulder my wife's brother got an idea. We took a manual ball bearing miller, and carved the waste of like butter. This was a brilliant solution, and after several hours we were done. The result was impressive, we felt like we had earned a medal for the effort. But the day was far from over.
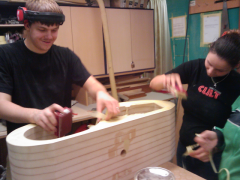
We began to glue the new elements together, a banana, 2 crabs and 4 cradles in no time. The element passed like bottles in an assembly line. No problem here. Afterwards we began to polish the first 3 bananas using a Random Orbit Sander, abrasive paper and more :)
We went on and on for several hours and finally collapsed in our beds at about 00:00.
Rise and shine, we took it easy that Sunday no pressure. We went down to the workshop at a reasonable time, cleaned up after us, packed the 3 bananas down. We cut out the cover plates we needed.
When we went to check up on the units in the press, I remembered the issue from the drawing. The issue was that there were not place enough for the Speaker Driver. Minor detail :/ This was a manual change made to the drawing, that was skipped by accident in the stressful Saturday morning. We agreed to figure a solution out next weekend, and headed home.
Later that day my wife's brother and his girlfriend went don’t and packet the rest of the elements down. Now the Crabs, Cradles and Bananas were units ready to finalize. It felt good; it actually still feels great :)
25th of August 2008
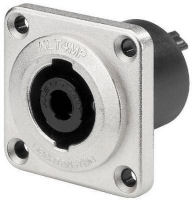
I ordered the speaker connection plugs. I chose Speakon plugs, because they look nice and because they are easy to plug-in and out, if the speakers needs to be moved :)
The plug is waterproof and used by many professionals because of its high quality and durability. I don’t believe that they improve sound quality, but it just feels wrong to economize on the final details.
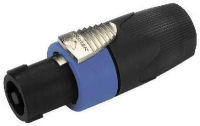
We chose these specific plugs:
2 * NLT-4MP
2 * NL-4FX
?th of September 2008
 I did not go down to the local HiFi shop to buy 2 Meters of Van Den Hul Speaker Cable. Because I don't buy into the fairytale about speaker cable being better than ordinary wire. And even if it is SO tempting to buy just 2 meters to finalize this great project. I did not fall into temptation. To emphasize how much I did NOT buy this cable. I present you with a picture of how the cable used does not look like.
 4th of September 2008
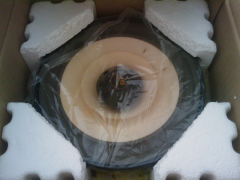
Our DX4's has finally arrived, this is one of the best days of all time I’m sure :D Packed in a plastic bag, then polystyrene, then a carbon box, then polystyrene bits and then another carbon box tapped shut. Those Germans at HifiSound sure knows how to secure their shipments!
Can't wait to hear these in the final PlayEX Horn. Now we just have to figure out what the song they will play on their premiere.
5th, 6th and 7th of September 2008
Once again we were heading for the forbidden land. The mysterious place. The place they called "The Workshop". And trust me there is a reason they call it that.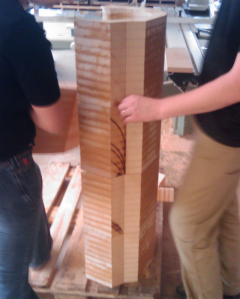 The tasks begain 14:30 Friday aftenoon, after we had found the elements and unwrapped them. We began to correct the previous mistake, by making room for the famous DX4's. This was done by hand, and the big stationary buzz saw.
This was done by angle and distances and took some time to get right. The result was acceptable, and we carried on.
The biggest task at hand was to make the surface on the element as smooth as possible. The idea was to lacquer them, but to achieve that the surface needed to be free of bits and pieces and be as sleek as possible.
The elements were hard to handle at first. The glue had made the edges razor sharp, and some of us cut our hands pretty bad. We walked through fire and water for these speakers!
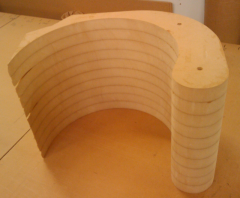
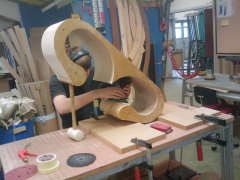
The bananas pretty straight forward. The Random Orbit Sander seemed like it was build for that exact task. The result was terrific, smooth and sleek like the softest skin.
The Cradles gave a few challenges. They have a razor sharp end, which had some holes and scratches that needed to be filled out with filler a few times. The slope on parts of the Cradle was too steep for the Random Orbit Sander. So some manual polishing was needed.
At the same time some of us started on the Crabs. They proved to be really troublesome. The Random Orbit Sander could only take the straight planes, so most of the work was to be done manually. The one Crab ( with a P ) Took all afternoon/evening until we took of to that Good'Old pizza pusher at 19:15
The next day we started 8:30 to get a head start. While my wife and her brothers girlfriend were on Cradle duty. Her brother and I began to drill holes in the Crabs for the Speaker Plugs. We needed to make room enough for some extra speaker cable, so that we can mount the Plugs with ease. But also to give us the option to change the plugs in case of emergency :)
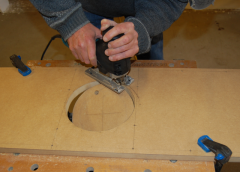
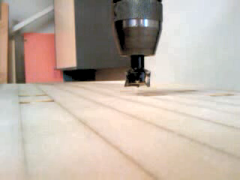 The plugs where 31mm in diameter, but the only drill we had available was 35mm. This proved to work just fine! It seemed like the luck had changed, temporarily anyway.
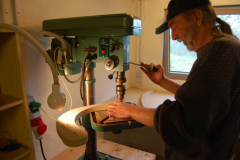
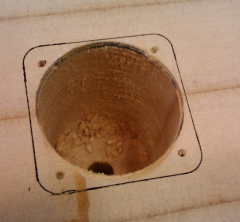 The Crab is about 40mm deep, so we raised the stationary to its maximum. When we were about to place the first Crab under the stationary drill, we could see it was close, really close, but it did fit under there! The image shows just how close.
We aimed for 55mm with the 35mm drill, to enable us to store some extra speaker cable. But the stationary could only get as far as 30mm in depth. But somehow things have a funny way of working out in the long run.
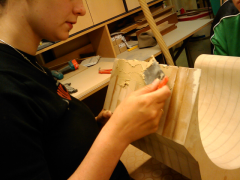 When we tried to drill a 9mm hole through the Crab, for the Speaker cable to reach the Driver. We could not reach the other end, because our drill was too short. To fix this we took the 35mm drill and placed it on our pneumatic hand handled drilling machine. This way we made the 50mm and got the 9mm all the way through. We even (almost) hit the exact center of both Crabs. Nice!
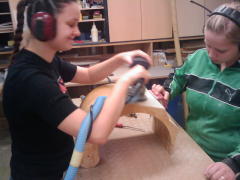
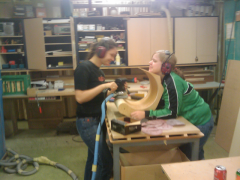
We polished the rest of the day. It was hard work but rewarding to feel the result. With only a 15 min breakfast break and a 2 hour dinner break in the evening. We went on until 01:00 in the night. Polishing, drinking Coke, filling the cracks, polishing and so on. We had a grand time with Coke, filling, abrasive paper and the radio on max. (Can’t wait to listen to those PlayEX DX4 loaded Horns :))
Now ready to lacquer we went to sleep.
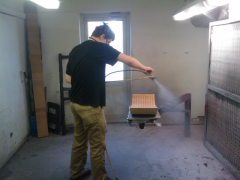
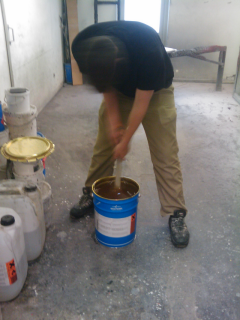
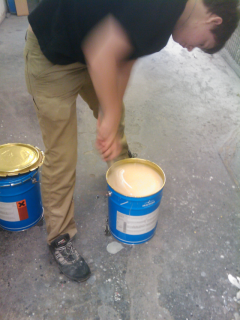
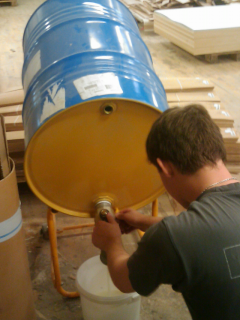
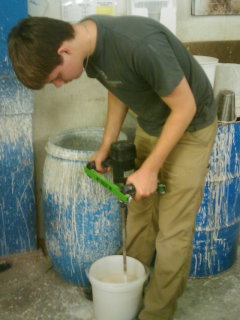
8:30 again. It was Sunday and we began the lacquer process. The elements were lightly re-polished, lacquer was mixed and we were ready to begin.
The process was repeated 2 times. When the last element was done, we started with the first again. After this, we waited 2 hours to then re-polish and re-lacquer them a 3rd time. This resulted in a really impressive smooth result.
Afterwards we packed the Internal Elements and Cover Plates down in our car and a trailer we had borrowed. Now the Internal Elements are almost done, they only need to be painted.
If we review our original goals at this midway point.
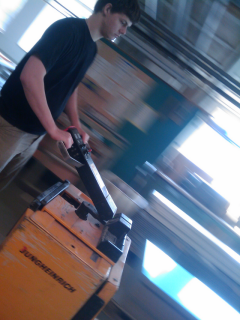
- Make the individual pieces as precise as possible.
- Success. Only the driver space was sawed out made manually. And the result was more than acceptable. The speaker cable holes were also very well performed.
- Make the individual pieces as even and sleek as possible, to enable a smooth expansion of the horn.
- Success. The surface is perfectly smooth and sleek. The tips of the Crabs are however a bit rough.
- Reduce dirt and sawdust to a minimum, to avoid ruining the driver.
- Total Success. No dirt or sawdust exists, because the elements are lacquered.
- Make the speaker as robust and firm as possible, to reduce vibrations in the chassis.
- Total Success. These elements are rock solid.
10th of September 2008
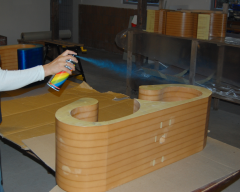
We were ready to paint the Internal Elements. But what color should we give them? The choice seemed to be between Black and White. The Decoration Plates are maple, and very brightly colored. My wife and I talked about it, and suddenly I could see an idea sparkle in her eye. "Let's make them Blue, not just blue, but metallic blue!” My immediate response was to decline. It would be too vivid, too aggressive, but the idea stuck in my head. The point was that the internal elements are only visible from the back of the Speaker.
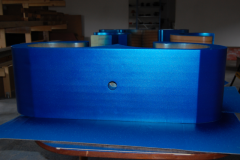
This is normally not showing. So why not? It would be great fun to see people’s looks, when shown. And to be frank, white or black would be kind of dull. This could be the one feature that would mark the spot, and take these speakers from minimalist and plain in their design to minimalist and unique :)
So we went for it. Again we needed to re-polish the elements a bit. But not so much. This actually made the elements even more smooth and sleek. And eliminated the roughness on the tips of the Crabs totally.
We went ahead and spray painted the elements, and the result speaks for itself. Though more painting was needed for the wanted result.
This was however not an either easy or cheap affair :) At this time we had bought 9 cans.
12th, 13th and 14th of September 2008
The task seemed simple. Just color and assemble the pieces, and we got two speakers. No big deal!But then again, I should have learned how different practice and theory is by now :)
We began to paint the pieces for the x time with the beautiful Blue Metallic Spray-paint. We now had bought 17 cans, and still going. The shop had only 8 left at their warehouse. The spraying of the elements where a very time consuming task. A task that called for a great deal of patience. Luckily my wife had just that!
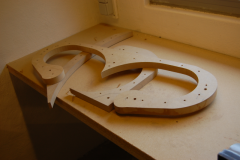
While she was painting, my father and me began to drill holes out in the side panels for the speakers. The holes had to match the holes in the elements, so that they would match them. The Bananas and Crab gave us no problems, and where actually a perfect fit. But to place the Cradles perfect we had to have some measurements. While retrieving these, we might as well check the rest.
The measurements fit perfectly with the drawings, at first. But suddenly there were some big differences. We went into a face of shock!! There were differences for up to 40mm (!) (That’s a lot, crazy much). We could not get the picture right. Everything else seemed to match perfectly.
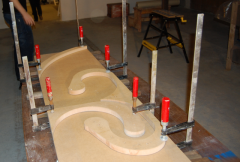 After some study of the initial drawings, and out project historic log. We discovered the origin of the mismatch.
The drawing we originally planned to create the speakers with was wrong. This was, in fact, the original drawing my father used for their speakers.
This drawing was, by accident, replaced Saturday the 23/8. When we had trouble with the CNC. This effectively meant that the Bananas where of the wrong drawing and the Crab and Cradle was of the right drawing. Fortunately we had used the same Banana on all the virtual CNC plates, so that matched perfectly with each other.
The result was that the initial face (which is by far the most important part. Was of the right drawing. Pure luck! ). We were more than relieved by this conclusion :) Our efforts were crowned with success :)
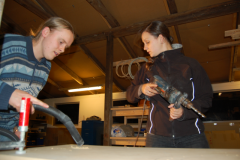 The elements silhouettes where drawn onto the first side plate. All the holes where marked, both for the dowels and screws. The Dowels job was steady the elements, the screws then would fixate them, and work as pressure for the glue. We did not have a professional press like at the workshop. But the screws should do the work just fine.
The holes were drilled, first through the extra models into the first side plate. Then transferred from one plate to another, by drilling. This looked really good :)
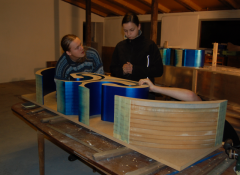 Now we began to place the dowels in the side panels, and tried to place the elements on the surface. Initially we drilled 8mm holes, to match the dowels. This did not work. The drilling in the original plate fit perfectly, but the "drill transfers" where a tat to in precise, so we tried with a 9mm. No luck, an 11mm, closer but not 100%. Then a 13mm, success!
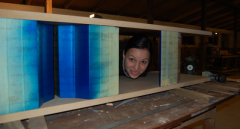 The elements where glued, the elements where placed onto it and we began to tighten the screws. The first few worked like a charm. But suddenly we heard an awful squeaking sound. One of the cradles had cracked :(
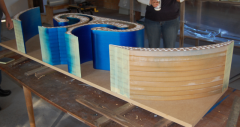 The screwdriver had broken one of the MDF plates in one of the cradles horizontally. This wasn't a functionally problem. But the finish would suffer. Luckily the crack was internal, so it could not be seen in the final speaker. We changed screw type and began to countersink the screws. This helped a lot.
We got a few minor cracks but nothing severe.
Looking back, we should have made made pre holes for the screws, this could have prevented the cracks.
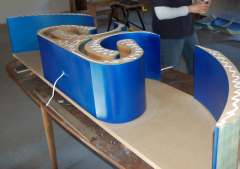
The cracks where covered correctly, and re painted. Just to get the finish perfect.
In this process we installed the (non Van Den Hul) speaker wire in the Crabs. This was done by filling the surrounding hole with Secomastic, closing the hole. Preventing fussy sound streams.
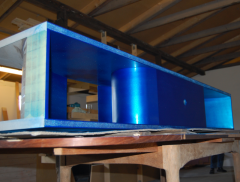 The elements where now repainted again. While my wife where painting, we drove back to the city for some more of that Metallic Blue Spray paint (Internal stock nr. 5004. Why I remember I do not know :))
This was the 4th time we were buying paint!
We needed 8 cans, but the shop girl told us there where but 7 in stock. Give and take, 7 should do the trick, but when she returned from the warehouse she had only one left. An error had acquired in their internal stock system. Basically we had now bought all their 5004's. Darn. They would restock next Thursday is they were in stock at their wholesaler. The friendly people told us to check out another shop in town, because they might have some left. So we raced down town, only to find the shop already closing. After some debate, we convinced the shop clerk to sell us their Metallic Blue Spray. That was but 1 can :(
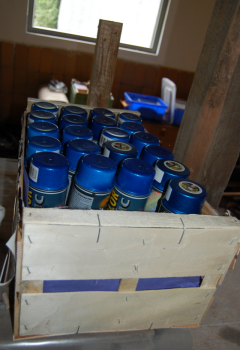
So we were down 6 cans. What to do, what to do? An idea formed in our minds; let’s try the local car parts shop. And bingo, 6 additional cans of Metallic Blue Spray where in the safe house.
This added up to a whooping 25 cans. That's a lot of paint.
A speaker needs a driver, a driver needs a hole, and a hole needs a jigsaw!
When the nice holes where cut, we tried to place the front plates on the speaker. To realize a new challenge!
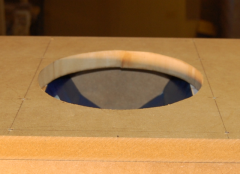 The driver space we cut out manually were calculated from the wrong drawing :( This meant that there was not room enough for the 190mm hole. This would give a problem later in the process, when we cut out the hole on the decoration plate. A solution was not far away though. We just had to cut out the front decoration plate before gluing it into the speaker. Problem solved!
 When spraying the end of the speaker ( The rear frame ), we found out that this part of the MDF absorbed most of the paint, and that it was almost impossible to get it blue, like the rest of the speaker. Instead of Metallic Blue, the end parts where just Metallic. This was a bit unsatisfactory, because we didn't want a blue rear in silver frame. We wanted a blue rear, period.
When examining the frame closer, we realized that parts of it were in fact a little blue. These parts where spots, where glue had spilled accidentally.
Using this knowledge we began to glue the frame, thereby making a foundation for the spray to stick to.
 The next morning we found that the glue had not worked as good as we had hoped for. The temperature had been to low during the night. That combined with the fact that we had not removed the old glue from the rear frame. Resulted in small spots of height differences in the frame. Nothing fatal, but a bit annoying never the less.
After some polishing and repainting, the result was acceptable.
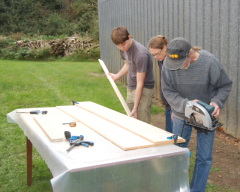
The decoration side panels were cut out with a buzz saw.
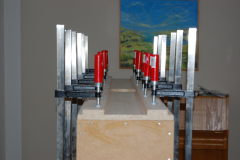
 Now there was nothing left to do but wait and think. It was getting cold outside, and the glue was only guaranteed to work above 10 degrees Celsius. The weather report pronounced temperatures down to zero, which would definitely give us problems.
Only thing missing from the speakers was the decoration plates, the speaker plugs and drivers.
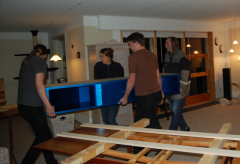 We decided to transport the speakers home, so that they could set in 20 degrees Celsius instead of 0 degrees Celsius :)
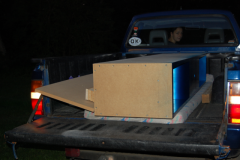
 The speakers where very heavy, but the 5 of us managed to get them home to our living room using a trailer and a pickup truck in one ride trip. Slow as it might be, we got them there safe and sound.
Afterwards we used special thin glue to glue on the front decoration plate. To get a nice result we used only clamps, not screws.
15th, 16th, 17th, 18th and 19th of September 2008
We began to glue the rest of the conver plates on the speakers. The process was fairly easy, the only issue was that the backside of the first speaker as damaged a bit by the pressure. No biggie, but abit anoying :)Every day we would change remove the clamps, turn the speaker over, glue another plate and insert the clamps.
The secound speakers backside was not damaged as must, so that will be the "showcase" speaker, we will show our friends :D
Our entire house was transformed into a workshop. To be able to live there we had the windows opened and had the wood stove on most of the days. This way we created a great air flow.
20th and 21th of September
We are nearing us the end of the line for the project. Now both speakers needs only 3 steps.
1) Oil processing
2) Speaker Driver
3) Speaker plug
We got up early in the morning, to get stuff done, and began to polish the speakers once more :)
When they where nice and smooth we started to oil them. This made the surface nice and bright. We repeated this process and then waited to the next morning to let the oil set.
The next day we started early again. This could be the last day in the project. Though a bit sad, I could not wait anymore. I was so exited to hear the result of our 100's hours of hard work.
The holes for the speaker drivers where drilled and mounted. It was a bit of a challenge to get them straight, because they are oval. But we got it eventually.
The plugs where a bit easier, though we had very little material to mount them in. Because of the 53mm hole we had drilled previouslly.
The ( VERY HEAVY ) speakers where moved into the two corners. They where pluggin in, and we started the music. Would it work ? Would they even be able to play, both of them ?
The answer was YES ! :D
The release of tenssion could not be oppressed any longer. They worked perfectly !! The sound was very crisp and clear. And very effectlive and warm at the same time. The first track played was: The Corrs - Toss The Feathers, an intrumental track with drums, violin, piano and flute. It was so life like it simply cannot be explained. It was so much more than I had expected. Even though there was so many different sounds at the same time, the speakers have no problem reproducing the details perfectly.
They play atleast 4 to 5 times higher than the old speakers given the same amount of watt. This is quite a fun fact. But the really amazing thing about thenm is that they fill the house with sound, even at low audiolevels.
Now we have hear a lot of different artists on them. To name a few: Beatles, Coors, Emerson Lake and Palmer, Primus, Pink Floyd, Angelo Badalamenti, FatBoy Slim, Justice, Daft Punk, The Storm, Seal, Buckethead, Ben Folds Five. All sound fantastic, it's really to have a brand new music collection, simply utterly out of the head amazing and fantastic !

Summary
Here is the project summed up in numbers:
Work Hours
Design face
2 people in ? hours
Crab, Cradle and Banana face
222 hours ( No kidding: 3 weekends: 16h + 107h + 99h )
Paint and assembly
Price
A lot.
Weight
Pictures from the project
Here are some atmospheric pictures from the project
